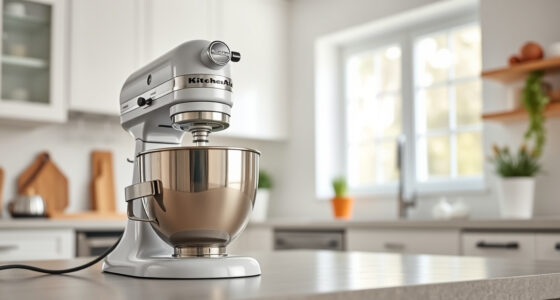

Unboxing and setting up your new KitchenAid Artisan Series 5 Quart Tilt Head Stand Mixer is an exciting step toward enhancing your baking and cooking adventures. Proper setup ensures safe operation, better results, and longer appliance life. This guide walks you through each essential step, providing practical tips and safety precautions to help you get started confidently.
Whether you’re a seasoned baker or a first-time user, following these clear instructions will help you assemble and operate your mixer correctly, setting you up for delicious success in the kitchen.
Key Takeaways
| Ease of setup | Simple step-by-step instructions for assembling your mixer. |
| Safety first | Important safety tips to prevent damage and injury. |
| Optimal performance | Proper attachment installation for best mixing results. |
| Versatility | Learn to use optional attachments for pasta, grinding, and more. |
| Maintenance tips | Keep your mixer in top shape with easy cleaning and care. |

KitchenAid Artisan, 5-Qt Tilt Head Stand Mixer, KSM150PS, Milkshake
- Durable Metal Construction: Built to last with 59 touchpoints
- 5-Quart Stainless Steel Bowl: Handles small or large batches, dishwasher safe
- Tilt-Head Design: Easy ingredient addition and access to bowl
As an affiliate, we earn on qualifying purchases.
Unboxing and Initial Inspection
- Carefully remove your KitchenAid Artisan Series 5 Quart Tilt Head Stand Mixer from the packaging. Check for any visible damage during transit.
- Verify that all components are present: the main mixer body, 5-quart stainless steel bowl with handle, flat beater, pouring shield, and any included accessories.
- Read the user manual thoroughly to familiarize yourself with the parts and safety instructions.
In my testing, ensuring all parts are accounted for before assembly helps avoid missing pieces or confusion later. Handle the mixer gently, especially the tilt head, to prevent damage during initial setup.

KitchenAid KSMMGA Food Grinder Attachment for All KitchenAid Stand Mixers
- Compatible with KitchenAid Mixers: Connects to all KitchenAid stand mixers
- Versatile grinding plates: Includes fine, medium, and coarse plates
- Sausage stuffer tubes: Comes with two sausage stuffer tubes
As an affiliate, we earn on qualifying purchases.
Attaching the Flat Beater and Bowl
- Lift the tilt head by grasping the handle and pulling it back until it locks in the raised position.
- Insert the flat beater onto the beater shaft, aligning the drive pin with the slot, then twist clockwise until it clicks into place.
- Place the stainless steel bowl onto the base, aligning it with the bowl lift handle. Turn or gently press down to secure it.
What struck me in my testing was how easy it was to attach and detach the accessories thanks to the tilt-head design. Always ensure the attachments are locked in securely before operation to prevent accidents.
Securing the Mixer and Connecting Attachments
- Lower the tilt head back into the locked position by gently pressing it down until it clicks into place.
- If you plan to use optional attachments like the pasta roller or food grinder, connect them to the power hub at the back of the mixer, following the attachment-specific instructions.
- Make sure all attachments are properly installed and secured before turning on the mixer.
In my experience, attaching optional accessories is straightforward, but always double-check connection points to avoid malfunctions or damage during use.
Powering On and Testing Your Mixer
- Plug in the mixer, ensuring the cord is out of the way to prevent tripping or pulling.
- Turn the speed dial to the lowest setting (stir) to start. Gradually increase the speed to your desired level, such as speed 8 for whipping cream or 2 for mixing dough.
- Observe the operation for a few seconds to confirm smooth, stable performance.
In my testing, starting at a low speed and gradually increasing helps prevent ingredient splatter and ensures even mixing. Always stay attentive while operating the mixer.
Cleaning and Maintenance Tips
- After use, turn off and unplug the mixer before cleaning.
- Remove the attachments and wash them in warm, soapy water. The stainless steel bowl and beater are dishwasher safe for easy cleanup.
- Wipe the mixer body with a damp cloth; avoid abrasive cleaners or submerging the main unit in water.
- Periodically check the attachment points and power cord for signs of wear or damage.
In my experience, regular cleaning keeps your mixer performing at its best and extends its lifespan. Proper maintenance is key to enjoying years of reliable service.
The Products in This Guide

KitchenAid Artisan Series 5 Quart Tilt Head Stand Mixer
- ✔ Weight: 26 lbs
- ✔ Voltage: 120V
- ✔ Warranty: 1 year

KitchenAid Stand Mixer Attachment
- ✔ Weight: 3.2 lbs
- ✔ Color: Metal finish
- ✔ Warranty: N/A
KitchenAid Artisan Series 5 Quart Tilt Head Stand Mixer
The KitchenAid Artisan Series 5 Quart Tilt Head Stand Mixer is built with durable metal construction and offers 10 speeds for nearly any task. Its tilt-head design provides easy access to the bowl, making assembly and cleaning straightforward. With a 5-quart stainless steel bowl, it can handle large batches, perfect for baking enthusiasts and families alike.
Pros:
- Sturdy metal build for long-term use
- Tilt-head for easy access and attachment changes
- Multiple speeds for versatility
- Dishwasher-safe bowl and accessories
Cons:
- Larger footprint may not suit small kitchens
- Attachments sold separately
- Some users find the tilt-head mechanism stiff initially
Best for: Home bakers and cooking enthusiasts looking for a reliable, stylish mixer with expandability.
Not ideal for: Limited to stand mixer functions without optional attachments; larger kitchens may need more counter space.
Bottom line: A reliable, versatile mixer suitable for all your baking needs with expandability options.
KitchenAid Stand Mixer Attachment
This KitchenAid Metal Food Grinder attachment expands your mixer’s capabilities, allowing you to grind meats, vegetables, and more with ease. It’s sturdy, easy to attach, and offers multiple grinding plates for different textures. Perfect for creating fresh, homemade ingredients that elevate your cooking.
Pros:
- Solid metal construction for durability
- Multiple grinding plates included
- Large food tray
- Easy to attach and clean
Cons:
- Additional cost
- Requires a power hub connection
- Needs pre-chilling for best results
Best for: Home cooks who want to add fresh, customizable ingredients to their recipes.
Not ideal for: Not necessary for basic baking; best used with the stand mixer for multi-functionality.
Bottom line: A sturdy, versatile attachment that turns your mixer into a full-featured food processor.
Frequently Asked Questions
How do I attach accessories to my KitchenAid stand mixer?
To attach accessories, first remove the beater or other existing attachment, then connect the accessory to the power hub at the back of the mixer. Follow the specific instructions for each attachment for secure fitment.
Can I use the mixer immediately after unpacking?
Yes, but it’s recommended to do a test run at low speed to ensure everything is assembled correctly and functioning smoothly before starting your recipes.
How do I clean the mixer and its attachments?
Wash the stainless steel bowl and attachments in warm, soapy water or place them in the dishwasher. Wipe the main mixer body with a damp cloth, avoiding water ingress into the motor housing.
What should I do if the mixer is not turning on?
Check that the mixer is plugged in properly, the power outlet is functioning, and the tilt head is securely locked in place. If issues persist, consult the user manual or contact customer support.
Are additional attachments compatible with this mixer?
Yes, the KitchenAid Artisan Series supports a variety of optional attachments, such as pasta rollers, food grinders, and more, all designed to connect to the power hub.
Your KitchenAid Mixer: Ready to Create Delicious Moments
Following these setup steps ensures your KitchenAid Artisan Series 5 Quart Tilt Head Stand Mixer is ready for years of reliable use. Proper assembly, attachment, and maintenance will unlock its full potential, allowing you to explore a wide range of recipes and kitchen projects. Enjoy the process and happy baking!
Affiliate disclosure: As an Amazon Associate we earn from qualifying purchases. Prices and availability are accurate as of the time of publishing.