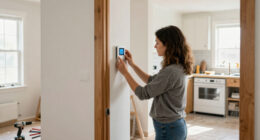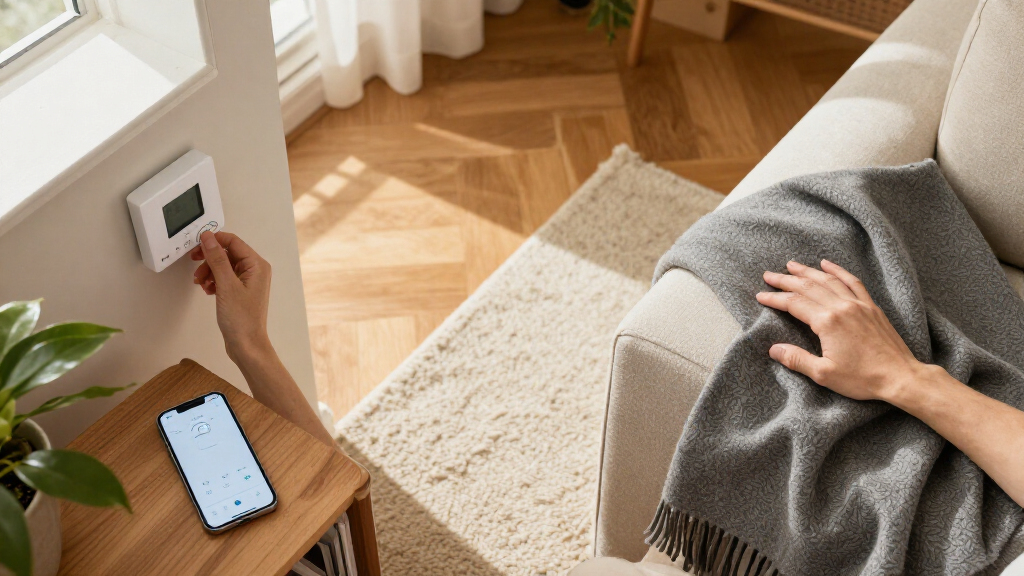

Set up a smart thermostat by checking your heating and cooling system, choosing a compatible model, replacing the existing thermostat, and configuring its app and schedule. This guide is for homeowners and renters with permission to change the thermostat who can follow basic instructions and use a screwdriver. Allow 1-2 hours, including time to check compatibility and test the system. Some wiring setups require a qualified HVAC technician; the guide explains when to stop and get help.

Get home appliances delivered free with Prime
- Fast, free delivery on millions of items
- Prime Video, Amazon Music and more included
- Member-only deals all year

Google Nest Thermostat Smart Programmable Wi-Fi Thermostat
- ✔ Connectivity: Wi-Fi, 2.4 GHz and 5 GHz
- ✔ Control: Google Home app, voice, button control
- ✔ Voice assistants: Google Assistant and Alexa
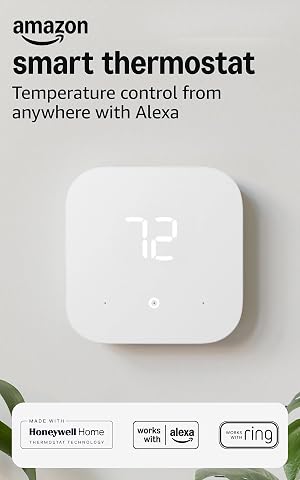
Amazon Smart Thermostat – Works with Alexa and Ring, C-wire Required
- ✔ Model: S6ED3R
- ✔ Dimensions: 3.56 × 3.56 × 0.84 inches
- ✔ Compatibility: Most 24V forced-air, heat pump, and radiant boiler systems

Honeywell Home Wi-Fi Smart Color Thermostat (RTH9585WF1004)
- ✔ Model: RTH9585WF1004
- ✔ Display: Customizable color touchscreen
- ✔ Schedule: Seven-day programmable
Difficulty: Intermediate | Time: 1-2 hours
What You’ll Need
Tools & Materials:
- Smart thermostat compatible with your heating and cooling system
- Small screwdriver
- Phone or tablet with the thermostat manufacturer’s app
- Home Wi-Fi network name and password
- Labels or masking tape and a pen
- Optional: drill, wall anchors, and a C-wire adapter approved for the thermostat
Knowledge:
- Basic use of a screwdriver
- Ability to identify your heating and cooling system type or check its documentation
- Access to the home’s circuit breaker and Wi-Fi settings
Check your lease or building rules before replacing a thermostat. If the home has multiple thermostats, a heat pump, electric baseboard heat, high-voltage wiring, or a system with multiple heating or cooling stages, confirm compatibility with the thermostat maker before buying. The wire labels and system type matter more than the old thermostat’s brand.
Google Nest Thermostat Smart Programmable Wi-Fi Thermostat
The Google Nest Thermostat is our best overall choice because it combines remote app access, scheduling, away adjustments, and voice control across Google Assistant and Alexa. For a household that wants its thermostat to respond to routines without relying on a large wall display, this is a more balanced option than Amazon’s Alexa-centered model. Its HVAC monitoring alerts also give it a practical role beyond changing the temperature, although alerts are not a substitute for servicing a system.Nest makes the most sense when household members want to adjust settings from their phones or use voice control, and when schedules vary enough that automatic away behavior can be useful. It is described as suitable for heat pumps and heating and cooling control, but buyers should still verify their specific system. One limitation is that some installations need a C-wire or power accessory; that uncertainty matters more than app features if wiring is not already available. Connected controls also rely on a stable Wi-Fi connection.Compared with Honeywell, Nest puts more emphasis on app-based automation than on a customizable touchscreen and detailed wall-side scheduling. Compared with Amazon, it offers a wider assistant mix and both 2.4 and 5 GHz Wi-Fi support. Choose it for flexible connected control; skip it if you want a large display or need a thermostat that operates independently of home internet.
Pros:
- Remote scheduling and control through the Google Home app.
- Automatically adjusts when the home is unoccupied.
- Works with Google Assistant and Alexa voice control.
- HVAC monitoring can alert users to potential system issues.
Cons:
- Some setups require a C-wire or additional power accessory.
- Connected features depend on stable Wi-Fi and internet access.
Best for: Households wanting app-based scheduling, away adjustments, and voice control through Google Assistant or Alexa.
Not ideal for: Homes without reliable Wi-Fi, or installations where C-wire requirements cannot be met without added power hardware.
Bottom line: Nest is the strongest all-around fit in this group for homes that want flexible app and voice control with automatic away adjustments.
“Nest is the strongest all-around fit in this group for homes that want flexible app and voice control with automatic away adjustments.”
Amazon Smart Thermostat – Works with Alexa and Ring, C-wire Required
For a home already organized around Alexa, the Amazon Smart Thermostat keeps temperature control inside the Alexa app and works with compatible Echo devices. Guided installation in the app is a useful advantage for buyers who want setup instructions tied to the thermostat, while scheduling and vacation mode cover the everyday routines most households need. Humidity sensing and automatic air-filter ordering add connected-home conveniences that Nest and Honeywell do not emphasize in the supplied feature set.Its focused ecosystem is also its main constraint. Voice commands require an Alexa-enabled device because the thermostat has no built-in far-field microphone. It connects only to 2.4 GHz Wi-Fi, so homes using a 5 GHz-only network will need a compatible network arrangement. Amazon also requires a C-wire or optional power adapter, making it less suitable for older or unusual wiring unless the buyer is prepared to address power separately.Compared with Nest, Amazon is a better fit for Alexa and Ring users but is less flexible on assistant choice and Wi-Fi bands. Compared with Honeywell, it offers more app-guided installation and Alexa-specific features, while Honeywell is the better match for people who want a large color screen and a seven-day wall schedule. Choose Amazon when your home already runs on Alexa and its wiring and network meet the requirements.
Pros:
- Alexa app control, scheduling, and vacation mode.
- Guided installation process through the Alexa app.
- Humidity sensing and automatic air-filter ordering.
- Compatible with Alexa and Ring smart home setups.
Cons:
- Requires a C-wire or optional power adapter kit.
- Voice control requires a separate Alexa-enabled device.
- Supports 2.4 GHz Wi-Fi only.
Best for: Alexa and Ring households with a compatible 24-volt HVAC system, C-wire or power adapter, and 2.4 GHz Wi-Fi.
Not ideal for: Homes that rely on Google Home, need 5 GHz-only connectivity, or lack a way to provide the required power.
Bottom line: Amazon is the clearest choice for Alexa-centered homes that meet its wiring and Wi-Fi requirements.
“Amazon is the clearest choice for Alexa-centered homes that meet its wiring and Wi-Fi requirements.”
Honeywell Home Wi-Fi Smart Color Thermostat (RTH9585WF1004)
The Honeywell Home Wi-Fi Smart Color Thermostat is the most display-centered option in this comparison. Its customizable color touchscreen and seven-day programmable schedule suit households that like to see and adjust settings at the wall, rather than managing every change through an app. Smart Response Technology, vacation hold, and utility demand-response compatibility add scheduling flexibility for homes where routines matter more than automatic away detection.Honeywell supports Alexa, Google Home, and its own app, giving it a broader assistant choice than Amazon. Its tradeoff is installation: it requires a C-wire and is not compatible with electric baseboard heating. The supplied compatibility description covers many forced-air, hot water, steam, and heat pump systems, but it also flags limitations for some heating-only oil furnace setups. Verify the exact system and wiring before choosing it.Compared with Nest, Honeywell offers a more prominent touchscreen and explicit seven-day programming, while Nest emphasizes automatic away behavior and app control. Compared with Amazon, Honeywell gives households an alternative to an Alexa-centered setup and includes Google Home support, but it lacks Amazon’s listed humidity sensing and filter-ordering features. Pick Honeywell when wall-side visibility and a hands-on schedule are priorities; skip it if your home uses baseboard heat or has no C-wire.
Pros:
- Customizable color touchscreen provides clear wall-side control.
- Seven-day scheduling, vacation hold, and Smart Response features.
- Works with Alexa, Google Home, and the Honeywell app.
- Supports many forced-air, hot water, steam, and heat pump systems.
Cons:
- Requires a C-wire and may need an adapter in some homes.
- Does not support electric baseboard heating.
- Some heating-only oil furnace setups may not be compatible.
Best for: Households that want a customizable color touchscreen, a seven-day schedule, and Alexa or Google Home compatibility.
Not ideal for: Homes with electric baseboard heating, no C-wire, or heating-only oil systems that cannot provide compatible wiring.
Bottom line: Honeywell is the best match for buyers who want a visible touchscreen and structured weekly programming, provided their wiring and HVAC system are compatible.
“Honeywell is the best match for buyers who want a visible touchscreen and structured weekly programming, provided their wiring and HVAC system are compatible.”
As an Amazon Associate we earn from qualifying purchases.
Before You Start
Read the thermostat’s compatibility and installation instructions before removing the old unit. Take a clear photo of the existing wiring, including the labels beside each wire. Turn off power to the HVAC system at its breaker or service switch before touching wires; a blank thermostat screen alone does not prove the power is off. If you find thick wires, wire nuts, a high-voltage warning, damaged insulation, or wiring that does not match the new thermostat’s guide, stop and contact an HVAC professional.
Step-by-Step Instructions
Step 1: Check system compatibility
Remove the old thermostat’s cover, without disconnecting any wires, and photograph the terminals and wire labels. Find the heating and cooling system type in the HVAC equipment manual, or check the outdoor unit and furnace or air handler labels. Compare that information and the wire labels with the thermostat maker’s compatibility checker and wiring guide. Confirm whether the new model supports your system and whether it needs a C-wire or an approved power adapter.
Tip:Wire colors are not reliable identifiers. Use the terminal labels, system documentation, and manufacturer guidance. If compatibility is unclear, send the wiring photo and equipment model numbers to the thermostat maker or an HVAC technician before purchasing.
Check: You have confirmed the thermostat supports the system, know which wire goes to each labeled terminal, and have a plan for supplying power if the model requires a C-wire.
Step 2: Choose a suitable thermostat
Select a model that supports the confirmed system type and the features you will use, such as app control, room sensors, voice assistant integration, or energy reports. Check that your phone supports the manufacturer’s app and that your Wi-Fi meets the thermostat’s requirements. Many models use 2.4 GHz Wi-Fi, even when your router also provides a 5 GHz network. Review the return policy in case the wiring check reveals an incompatibility.
Tip:For an apartment or shared building, check with the property manager before buying. A central building system may use controls or wiring that a standard home thermostat cannot operate.
Check: The chosen model’s compatibility list includes your system, and you have the required app, network access, and any specified adapter.
Step 3: Prepare the installation area
Install the manufacturer’s app and create or sign in to your account. Gather the thermostat, mounting plate, screws, labels, and any included wiring parts. Set the current thermostat to Off, then switch off the HVAC breaker or service switch. Verify that the old display goes dark and that the system does not start when you adjust its controls. Keep the wiring photo available on your phone.
Tip:If you cannot identify the correct breaker, switch off the HVAC system at its service switch or ask an electrician or HVAC technician. Do not proceed with live wiring.
Check: The HVAC system is powered off, the app is ready, and the installation parts and wiring reference are within reach.
Step 4: Remove the old thermostat
Take off the old thermostat cover and label each wire with the terminal letter where it was connected, such as R, W, Y, G, or C. Match labels to the terminal letters rather than wire colors. Disconnect one wire at a time and keep each wire from slipping into the wall; wrap it around a pencil or hold it in place. Remove the old mounting plate after all wires are labeled and disconnected.
Tip:Some older thermostats contain a sealed glass tube with mercury. If you see one, avoid breaking it and follow local rules for hazardous household waste.
Check: All wires remain accessible and have labels matching the old terminal positions, with a photo saved as a backup.
Step 5: Mount and wire the new thermostat
Feed the wires through the new mounting plate and attach it to the wall using the included screws and anchors. Connect each labeled wire to the terminal specified in the thermostat’s wiring guide. Insert the conductor fully and secure it as directed. Install an approved C-wire adapter only if the thermostat maker’s instructions call for one and the adapter matches your HVAC equipment. Tuck the wires gently into the wall, then attach the thermostat display to its base.
Tip:Do not guess at terminals or force a wire into a connector. If you have a jumper, proprietary connector, or wire labels that do not match the guide, leave the power off and contact the maker or an HVAC technician.
Check: The wall plate is secure, each wire is firmly connected to the specified terminal, and the thermostat is seated on its base without pinched wires.
Step 6: Restore power and complete setup
Turn the HVAC breaker or service switch back on. Follow the thermostat’s on-screen prompts or app instructions to choose the language, home location, equipment type, and heating or cooling configuration. Connect it to the required Wi-Fi network and install any available setup updates. Name the thermostat by location if the app offers that option, especially when you have more than one.
Tip:Use the system type confirmed during the compatibility check. Choosing the wrong fuel, heat pump setting, or number of heating stages can cause poor operation even when the wiring is correct.
Check: The thermostat stays powered on, joins Wi-Fi, and completes setup without an equipment or wiring error.
Step 7: Test heating and cooling
Use the thermostat to request heat, wait several minutes, and confirm that the system responds. Return the mode to Off, then test cooling if your system supports it and outdoor temperatures are within the equipment maker’s operating guidance. Allow the equipment’s normal delay before expecting it to start. Listen for unusual sounds and check that air comes from the expected vents. Return the thermostat to a comfortable setting after each test.
Tip:Do not rapidly switch between heating and cooling. Many systems pause between modes to protect the equipment. Follow the thermostat or HVAC manual’s wait times.
Check: The system responds to the requested modes, airflow is normal, and no error message appears. A heat pump may take a few minutes to deliver warm or cool air.
Step 8: Set a practical schedule
Choose a schedule based on when people are home, asleep, or away, and set temperatures that feel comfortable while avoiding unnecessary heating or cooling. Start with a small number of time periods, then adjust after observing the home’s comfort for several days. Set the correct time zone and enable location features only if you want the thermostat to change settings based on household members’ phones. Review any energy-saving or away mode before turning it on.
Tip:Large temperature jumps do not make a home reach the target faster on most systems. Start with modest changes and consult your HVAC or thermostat manual for heat pump guidance, since some settings can trigger auxiliary heat.
Check: The displayed time and schedule match your household routine, and the thermostat shows the intended target temperature and mode.
Common Mistakes to Avoid
- Choosing a thermostat based on wire colors alone. — Record terminal labels and check the system documentation and maker’s compatibility guide before buying or connecting wires.
- Leaving HVAC power on while handling wires. — Switch off the system at the breaker or service switch and confirm the old thermostat display goes dark before disconnecting anything.
- Guessing at a missing C-wire or installing an unapproved adapter. — Check the exact thermostat and HVAC instructions. Have a technician assess unclear wiring or equipment connections.
- Setting the wrong equipment type or expecting instant heating or cooling. — Select the confirmed system configuration and allow the equipment’s normal startup delay before changing settings again.
Troubleshooting
Problem: The thermostat does not power on.
Solution: Check that the HVAC breaker and service switch are on, then reseat the display on its base. Review the wiring guide and confirm the required power wire or approved adapter is connected. If the display remains blank, switch power off and contact the manufacturer or an HVAC technician.
Problem: The app cannot find or connect to the thermostat.
Solution: Confirm that the phone and thermostat are near the router during setup, the Wi-Fi password is correct, and the network uses a supported frequency and security setting. Restart the router and thermostat if the maker recommends it, then retry setup.
Problem: Heating or cooling does not start after a mode change.
Solution: Wait for the system’s built-in delay, check that the thermostat is set to the correct mode and target temperature, and confirm HVAC power is on. If the thermostat reports a wiring or equipment error, turn power off and compare connections with the saved photo and official wiring guide.
Problem: The system runs, but the home feels too warm or too cool.
Solution: Check the thermostat’s location and schedule, and make sure it is not exposed to direct sunlight, drafts, or heat from appliances. Adjust the schedule in small increments. If temperature readings remain inaccurate or the system cycles unusually, contact an HVAC technician.
What Success Looks Like
The thermostat remains powered, connects to the home network, reports the correct mode and temperature, and starts the heating and cooling equipment when asked. Its schedule follows the household routine, and the app shows the thermostat as online. After monitoring it for a few days, the home should stay comfortable without unexpected system starts or persistent error messages.
Next Steps
Keep the old thermostat and its wiring photo until the new setup has worked reliably for several days. Check the app after the first scheduled change and review energy use or comfort reports after a week. Replace batteries or clean the thermostat only as the manufacturer directs. If you move, change HVAC equipment, add a room sensor, or see repeated wiring and equipment alerts, revisit the compatibility and setup instructions or arrange service with an HVAC technician.
Frequently Asked Questions
Do I need a C-wire for a smart thermostat?
Some models need a C-wire for steady power, while others can operate without one or include an approved adapter. Check the exact model’s compatibility guide and follow its instructions; do not assume an unused wire is a C-wire without confirming its connection at the HVAC equipment.
Can I install a smart thermostat myself?
Many homeowners can install one when the equipment is compatible, the wiring is clearly labeled, and power can be safely switched off. Use a qualified HVAC technician for high-voltage wiring, unclear terminals, complex systems, or any setup the thermostat maker excludes from homeowner installation.
Will a smart thermostat work without Wi-Fi?
Basic temperature control may still work on many models, but app access, remote control, updates, and some smart features usually need internet access. Check the product manual for what remains available offline.
How long should the system take to respond?
Thermostats and HVAC equipment can have a delay of several minutes, especially after switching modes. Follow the equipment instructions and wait through the stated delay before changing the setting again. If the system still does not respond, check power, mode, target temperature, and any displayed error.
What should I do if the old wiring labels do not match the new thermostat?
Keep the HVAC power off and use the new thermostat’s compatibility checker and wiring guide alongside the old terminal labels and equipment manual. Contact the thermostat maker or an HVAC technician if the guide does not clearly map each wire.