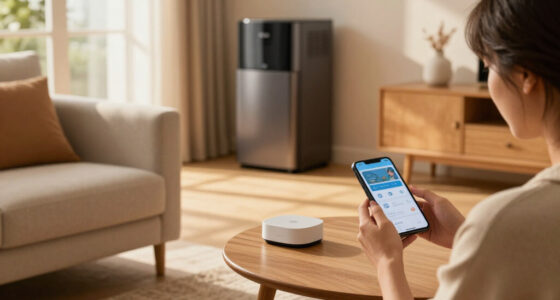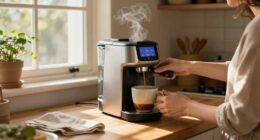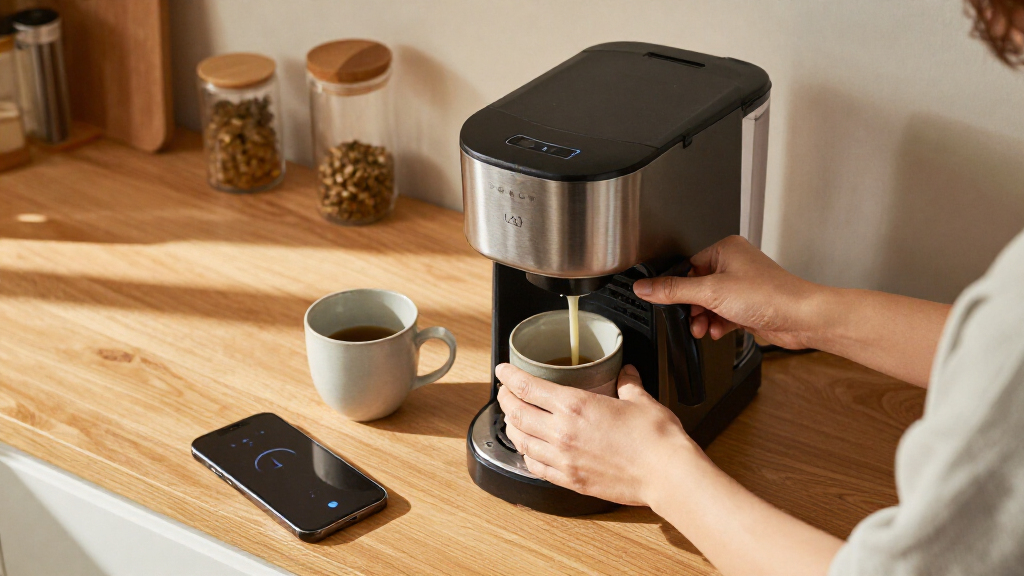
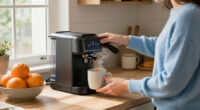
Set up your smart coffee maker, connect it to its companion app, and brew a test pot or cup. This guide is for first-time owners who can use a smartphone and have access to a home Wi-Fi network. Allow 30-45 minutes for setup and testing; the exact steps and available features vary by model.

Get home appliances delivered free with Prime
- Fast, free delivery on millions of items
- Prime Video, Amazon Music and more included
- Member-only deals all year

GE Profile Smart Grind and Brew Coffee Maker with Podless Single Serve
- ✔ Brew options: Single serve and 10-cup thermal carafe
- ✔ Coffee input: Whole beans
- ✔ Grinder: Adjustable burr grinder, six settings

Keurig K-Supreme Plus SMART Single Serve Coffee Maker Black Stainless Steel
- ✔ Coffee input: K-Cup pods
- ✔ Capacity: 78 fl oz reservoir
- ✔ Brew sizes: Five cup-size settings

Keurig K-Café SMART Single-Serve Coffee Maker, Black
- ✔ Beverage types: Coffee, coffee shots, lattes, cappuccinos, macchiatos, iced coffee
- ✔ Pod compatibility: K-Cup pods
- ✔ Frother: Hot and cold settings; three speeds
Difficulty: Beginner | Time: 30-45 minutes
What You’ll Need
Tools & Materials:
- Smart coffee maker and its water reservoir, carafe, or brew basket
- Smartphone or tablet with the maker’s companion app installed
- Home Wi-Fi name and password
- Coffee, a filter if the machine requires one, and fresh water
Knowledge:
- Basic smartphone and app use
- How to connect a device to a home Wi-Fi network
Place the machine on a level, dry surface near an outlet and within range of your Wi-Fi router. Check the maker’s quick-start guide for model-specific instructions, supported Wi-Fi bands, and whether setup requires Bluetooth or location access on your phone. Use the included parts; some models require a first-use rinse or descaling setup before brewing.
GE Profile Smart Grind and Brew Coffee Maker with Podless Single Serve
The GE Profile Smart Grind and Brew is the most versatile choice in this group because it covers two very different routines: a mug brewed directly from whole beans and a full 10-cup thermal carafe. Its burr grinder has six settings, and controls for strength, volume, temperature, and bloom let us tailor more than just the brew time. Wi-Fi, the SmartHQ app, and voice control add scheduling and remote operation to that flexibility.Compared with the K-Supreme Plus SMART, GE avoids K-Cup dependence and offers a carafe for serving several people. That is a substantial advantage if fresh beans and batch brewing matter to us. The tradeoff is a more involved workflow: we need to keep whole beans on hand, and the grinder adds another part to maintain. The Keurig models are simpler when we want a quick pod-based cup, and the K-Café SMART is the better fit for frothing milk. We should choose GE for its bean-to-cup range, not if we want the least involved single-serve setup.
Pros:
- Grinds whole beans with six adjustable settings.
- Makes a single serving or a 10-cup carafe.
- Offers customizable strength, volume, temperature, and bloom controls.
- Supports Wi-Fi app and voice control.
Cons:
- Requires whole beans to use its grinder.
- App and voice features depend on Wi-Fi and the SmartHQ app.
- Its broader grind-and-brew workflow is less direct than using K-Cup pods.
Best for: Households that want fresh-ground single servings as well as a thermal carafe, with app or voice controls for scheduled brewing.
Not ideal for: People who prefer K-Cup convenience, do not want to handle whole beans, or mainly want espresso-style milk drinks.
Bottom line: Choose the GE Profile if we want one connected machine to cover both freshly ground single cups and larger carafe batches.
“Choose the GE Profile if we want one connected machine to cover both freshly ground single cups and larger carafe batches.”
Keurig K-Supreme Plus SMART Single Serve Coffee Maker Black Stainless Steel
For a household already committed to K-Cup pods, the K-Supreme Plus SMART puts its smart features toward the cup itself. BrewID recognizes compatible pods and applies settings informed by the coffee’s brand and roast, while five strength levels, six temperature settings, and five cup sizes give us room to adjust. Its 78-ounce reservoir also means fewer refills than the K-Café SMART’s listed 1,100 ml capacity, a practical edge when several people brew throughout the day.Unlike the K-Café SMART, this model does not include a milk frother, so it is better for customized coffee and iced coffee than lattes and cappuccinos. Its MultiStream technology is designed to wet grounds more evenly, and an extra-strong iced setting aims to reduce dilution as ice melts. The app adds scheduling, saved preferences, and remote brewing, but the Wi-Fi requirements are specific: it needs a 2.4 GHz WPA2-PSK network. We should skip it if our home network cannot meet that requirement or if we want whole-bean brewing like the GE Profile.
Pros:
- BrewID customizes settings for recognized K-Cup pods.
- Large 78-ounce reservoir reduces refill frequency.
- Five strength and six temperature settings provide cup-level adjustment.
- Includes an extra-strong iced coffee setting and app scheduling.
Cons:
- Limited to K-Cup pods.
- No built-in milk frother, unlike the K-Café SMART.
- Wi-Fi setup requires a compatible 2.4 GHz WPA2-PSK network.
Best for: K-Cup drinkers who want pod-informed settings, a large reservoir, and app access to saved or scheduled brews.
Not ideal for: Buyers who want a built-in frother, whole-bean grinding, or a brewer that works with a 5 GHz-only Wi-Fi network.
Bottom line: For K-Cup households, this is the most practical smart pick when customized cups and fewer reservoir refills matter more than milk drinks.
“For K-Cup households, this is the most practical smart pick when customized cups and fewer reservoir refills matter more than milk drinks.”
Keurig K-Café SMART Single-Serve Coffee Maker, Black
The K-Café SMART is the clearest match for anyone who wants a pod machine to make more than a standard cup. Along with K-Cup coffee, it brews concentrated coffee shots and offers a built-in frother with hot and cold settings and three speeds. That gives us a simple route to lattes, cappuccinos, macchiatos, and iced drinks without adding a separate frother to the counter.Like the K-Supreme Plus SMART, it uses BrewID and offers five strength and six temperature settings, plus app scheduling and remote brewing. The difference is its emphasis: the K-Supreme has a larger 78-ounce reservoir and MultiStream technology, while the K-Café uses its extra capability for milk drinks. Its listed 1,100 ml capacity is more modest, and buyers should confirm that the K-Cup format suits their pantry. Compared with the GE Profile, it is easier for pod-based drinks but cannot grind whole beans or make a 10-cup carafe. We should pick this model for frothing convenience, and pass if plain coffee is our main goal.
Pros:
- Built-in frother supports hot and cold drinks with three speeds.
- Brews coffee, coffee shots, and a range of hot or iced drinks.
- App supports scheduled and remote brewing with saved settings.
- Offers five strength and six temperature settings.
Cons:
- Limited to K-Cup pods.
- Connected features, including BrewID, require Wi-Fi and the Keurig app.
- Its listed 1,100 ml capacity is smaller than the K-Supreme Plus SMART reservoir.
Best for: K-Cup users who regularly make hot or iced milk drinks and want app-based scheduling and remote brewing.
Not ideal for: People who mostly drink plain coffee, want whole-bean grinding, or need a large reservoir for frequent back-to-back cups.
Bottom line: Choose the K-Café SMART when a built-in frother and coffeehouse-style drinks are central to our routine.
“Choose the K-Café SMART when a built-in frother and coffeehouse-style drinks are central to our routine.”
As an Amazon Associate we earn from qualifying purchases.
Before You Start
Check the machine’s safety instructions before filling or plugging it in. Keep the base and power cord dry, and do not operate the brewer without its required carafe or cup in place. A scheduled brew may start automatically, so only enable scheduling after you know the machine is set up to brew safely and has the needed water, coffee, filter, and vessel.
Many smart brewers connect only to a 2.4 GHz Wi-Fi network during setup. If your router combines 2.4 GHz and 5 GHz under one network name, follow the manufacturer’s instructions for pairing. Do not guess at button sequences; use the guide for your exact model.
Step-by-Step Instructions
Step 1: Unpack and position the brewer
Remove packaging, stickers, and shipping inserts from the machine and its removable parts. Set the brewer on a stable, level counter, leave the ventilation space specified in its manual, and plug it into a grounded outlet. Wash removable parts that the manual says are washable, then dry and reinstall them.
Tip:Do not immerse the brewer’s base or power cord in water. Keep the machine away from the sink edge, stovetop heat, and areas where steam could damage cabinets.
Check: The machine sits level, its removable parts are clean and correctly installed, and the cord reaches the outlet without stretching.
Step 2: Install the companion app
Find the app name in the machine’s manual, packaging, or manufacturer’s website. Download that app from your phone’s official app store, open it, and create an account or sign in if prompted. Allow only the phone permissions the app requests for setup, such as Bluetooth or local network access.
Tip:Confirm the app publisher matches the coffee maker’s manufacturer. Avoid apps found through unrelated advertisements or unofficial download sites.
Check: The app opens to its home or device setup screen, and you can sign in or proceed as a guest if the model supports that option.
Step 3: Prepare the brewer for pairing
Turn on the coffee maker and put it into Wi-Fi or device-pairing mode using the model-specific instructions. Open the app, choose its add-device option, and select the correct coffee maker model when it appears. Keep your phone close to the brewer while pairing.
Tip:If the brewer does not appear, check that Bluetooth and any requested local network permission are enabled on your phone. Restart pairing using the manual’s steps rather than repeatedly tapping controls.
Check: The app detects the brewer or displays the correct model as the next device to configure.
Step 4: Connect the brewer to Wi-Fi
Choose your home network in the app and enter its password carefully. If the app asks for a network type or band, select the option supported by your brewer, often 2.4 GHz. Wait for the app and machine to confirm the connection before closing the setup screen.
Tip:Network passwords are case-sensitive. A phone connected to a guest network, VPN, or mobile hotspot may prevent setup; use the home network intended for the brewer.
Check: The app lists the coffee maker as connected or online, and the brewer’s Wi-Fi indicator shows the state described in its manual.
Step 5: Set preferences and device details
Give the brewer a clear name, such as “Kitchen Coffee Maker,” then set any available time zone, clock, cup-size, strength, temperature, or notification preferences. Review app controls and the machine’s manual to learn which functions can be controlled remotely and which require pressing a button on the brewer.
Tip:App controls differ by model. Do not assume that a remote start feature is available or safe unless the manufacturer describes it for your machine.
Check: The device appears under the name you chose, and its settings match your preferences.
Step 6: Run the first-use rinse
Fill the reservoir with fresh water to the amount specified for the initial rinse. Leave coffee out unless the manual says otherwise, position the required carafe or cup, and start the cleaning or rinse cycle described by the manufacturer. Empty the vessel when the cycle ends.
Tip:Some models require more than one rinse or a specific cleaning cycle. Follow the printed instructions instead of substituting a regular brew program.
Check: The rinse completes without an error, and the machine is ready for coffee according to its indicator or setup instructions.
Step 7: Brew and check a test serving
Add fresh water and coffee using the quantities and grind size recommended for your brewer. Install a paper or reusable filter if needed, place the carafe or cup correctly, and select a simple brew setting in the app or on the machine. Start the brew and wait for the cycle to finish before removing the vessel.
Tip:For a first test, make a small batch if your model allows it. This helps you check the flavor and serving size without wasting coffee.
Check: The machine completes the cycle without leaking or displaying an error, and coffee reaches the vessel. Adjust coffee, water, or strength settings for the next brew if the taste is too weak or strong.
Step 8: Create and verify a brew schedule
Open scheduling in the app, choose a time and repeat days, then select a brew size or recipe if offered. Before saving, confirm the machine’s clock and time zone are correct. Prepare the brewer with the required water, coffee, filter, and carafe, then save the schedule and check that it appears as enabled in the app.
Tip:Do not schedule a cycle if your machine requires an action you have not prepared, such as inserting a carafe or adding coffee. Check the manual for whether the brewer can remain loaded between uses.
Check: The schedule appears with the correct time and days, and the app or machine shows it is active. For the first scheduled brew, verify that it starts and finishes as expected.
Common Mistakes to Avoid
- Entering the wrong Wi-Fi password or choosing an unsupported network band. —
Check the password’s capitalization and connect the brewer to the supported network band listed in its manual, commonly 2.4 GHz.
- Skipping the first-use rinse or using coffee during a rinse cycle. —
Follow the maker’s initial-cleaning instructions before brewing, including the required number of water-only cycles.
- Saving a schedule without preparing the brewer. —
Before enabling a schedule, confirm the machine has the required water and coffee and that the correct filter and vessel are in place.
- Assuming every app control works while away from home. —
Check the model’s manual and app settings to see which functions need the phone nearby, a network connection, or a button press on the machine.
Troubleshooting
Problem: The app cannot find the coffee maker.
Solution:
Move your phone close to the machine, confirm the brewer is in pairing mode, and enable Bluetooth or requested local network access. Restart the pairing process following the manual. If it still does not appear, power-cycle the brewer and phone, then try again.
Problem: Wi-Fi setup fails or the brewer goes offline.
Solution:
Re-enter the network password, check that the brewer supports the selected band, and move it closer to the router during setup. Temporarily disconnect a VPN on the phone if the maker’s instructions recommend it. Restart the router or brewer if needed, then reconnect through the app.
Problem: The brew does not start at the scheduled time.
Solution:
Check that the schedule is enabled, the machine clock and time zone are correct, and the brewer has power. Confirm that required parts and ingredients are loaded, and check the app for a pause, error, or offline status.
Problem: The coffee tastes weak, strong, or off.
Solution:
Use fresh coffee and clean water, then adjust the coffee-to-water amount or strength setting gradually. Clean the brew basket and carafe. If taste remains poor or flow is slow, run the cleaning or descaling procedure specified for your model.
What Success Looks Like
The setup is complete when the app shows the brewer connected, a manual test brew finishes and produces coffee in the vessel, and any saved schedule shows the intended time and days as active. The machine should sit securely, show no leaks or persistent error indicators, and be ready with the correct supplies before a scheduled cycle.
Next Steps
Empty and rinse the carafe and brew basket after use, discard grounds and filters, and wipe external surfaces with the method specified in the manual. Refill the reservoir with fresh water before the next brew. Clean the machine and descale it at the intervals recommended by the manufacturer, or sooner if a cleaning alert appears or flow slows. Review app notifications and schedules after changing routers, passwords, time zones, or household routines.
Frequently Asked Questions
Can I use a smart coffee maker without Wi-Fi?
Many models can brew using their physical controls without Wi-Fi, but app features and remote schedules may stop working. Check the manual for offline functions on your model.
Does my phone need to stay near the brewer?
Usually, the phone needs to be nearby during initial pairing. After the brewer joins Wi-Fi, remote app controls may work over the internet if the model supports them.
Why does my smart coffee maker need a 2.4 GHz network?
Some connected appliances use 2.4 GHz Wi-Fi because their network hardware supports that band. Check the model’s specifications; if your router uses one shared network name, follow its setup instructions.
Can I schedule coffee when the machine is empty?
You can save a schedule, but the brewer may not make coffee unless it has the required water, coffee, filter, and vessel. Prepare it according to the manual before the scheduled start.