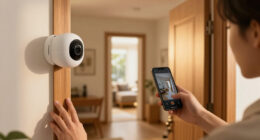
Install and configure smart home security cameras to monitor selected areas, record footage, and notify you when activity occurs. This guide is for homeowners and renters who can use a smartphone app and basic household tools. Allow 1-3 hours, depending on the number of cameras, mounting surfaces, and network setup. You will finish with cameras positioned and connected, privacy settings reviewed, and alerts and recordings checked.

Get home appliances delivered free — and shop member deals
- Fast, free delivery on millions of items
- Access to Prime Big Deal Days deals on October 6–7
- Prime Video, Amazon Music and more included

Reolink 8-Channel 4K Security Camera System with PT Auto-Tracking
- ✔ Channels: 8
- ✔ Included cameras: 4 PoE cameras
- ✔ Resolution: 8MP (3840 × 2160)

Hiseeu 12MP PoE Security Camera System with 8 Cameras
- ✔ Included cameras: 8 PoE cameras
- ✔ NVR channels: 16
- ✔ Resolution: 12MP

Blink Outdoor 4 Wireless Security Camera System, 5 Cameras with Sync Module Core
- ✔ Included cameras: 5 Outdoor 4 cameras
- ✔ Resolution: 1080p HD
- ✔ Field of view: 143° diagonal
Difficulty: Beginner | Time: 1-3 hours
What You’ll Need
Tools & Materials:
- Smart home security camera and its power adapter or charged battery
- Smartphone or tablet with the camera maker’s app
- Home Wi-Fi network name and password
- Drill, suitable drill bit, screwdriver, and mounting hardware for fixed cameras
- Ladder for high mounting locations
- Measuring tape and pencil
- Outdoor-rated extension or power equipment if the camera requires it
Knowledge:
- Basic smartphone app use
- Ability to connect a device to home Wi-Fi
- Basic safe use of a drill and ladder for cameras that need mounting
Check the camera’s box or product page for supported Wi-Fi bands, weather rating, power requirements, storage options, and any hub requirement. Confirm that you can reach the mounting location safely and that you have permission to drill into the surface. Renters should check their lease or ask the property owner before making holes. Set aside time to test Wi-Fi at each planned camera location before mounting.
Reolink 8-Channel 4K Security Camera System with PT Auto-Tracking
Reolink takes the top spot because it combines 4K resolution, pan-and-tilt tracking, and local continuous recording in a system sized for many homes. Its four cameras can pan 355 degrees and tilt 50 degrees, then automatically track movement. That flexibility can help one camera cover more of a yard or driveway than a fixed-angle camera, although it cannot replace careful placement at every entrance.Compared with Hiseeu’s eight-camera bundle, Reolink includes fewer cameras and offers a narrower starting footprint. Its advantage is active tracking and detection for people, vehicles, and animals, rather than simply adding fixed viewpoints. The built-in 2TB drive supports continuous, scheduled, or motion recording and can be expanded up to 16TB. Buyers who want high detail without relying on cloud storage will find this a compelling balance.The cost of that capability is installation effort: every camera needs a PoE cable connection, so we should plan cable routes before choosing locations. The included drive is also smaller than the system’s maximum expandable capacity. Reolink is better suited to owners who can install wired cameras and value detail and tracking; renters or anyone seeking quick, cable-free placement should consider Blink instead.
Pros:
- 4K video with color and infrared night vision
- Automatic pan-and-tilt tracking with customizable preset points
- Person, vehicle, and animal detection plus two-way talk
- Built-in 2TB storage supports continuous recording and expansion
Cons:
- Each camera needs a wired PoE connection, adding installation work
- The included 2TB drive is below the system’s 16TB maximum capacity
Best for: Homeowners who want detailed video, tracking cameras, and continuous local recording across a moderate-size property.
Not ideal for: Renters or buyers who cannot run Ethernet cables, or those who need eight cameras included from the start.
Bottom line: We recommend Reolink first for its combination of 4K coverage, active tracking, broad detection, and expandable local recording.
“We recommend Reolink first for its combination of 4K coverage, active tracking, broad detection, and expandable local recording.”
Hiseeu 12MP PoE Security Camera System with 8 Cameras
When coverage across a large property matters more than camera movement, Hiseeu makes a strong case with eight included PoE cameras and a 16-channel NVR. That gives us more fixed viewpoints from day one than Reolink’s four-camera package, with spare NVR channels for future expansion. Its 121-degree viewing angle is designed to take in a broad area, while 12MP capture offers high stated resolution.Hiseeu also includes useful everyday security tools: human and vehicle detection, app alerts, two-way audio, and color night vision. It supports continuous or motion-triggered recording, so buyers can choose between a fuller record and event-focused footage. Unlike Blink, footage is handled through a wired recorder rather than depending on cloud storage. Compared with Reolink, though, the cameras are presented as a broad multi-camera coverage solution rather than a set with pan-and-tilt auto-tracking and animal detection.There are two points to settle before choosing it. First, eight wired cameras mean substantial cable planning; the flexibility of 16 NVR channels does not remove the need for connections, and adding cameras beyond the included set requires a PoE switch that is not included. Second, the listing conflicts on drive size, naming 4TB in the description and 3TB in the specifications. Hiseeu fits buyers who need numerous fixed views, but the storage ambiguity makes it less straightforward than Reolink.
Pros:
- Eight PoE cameras and a 16-channel NVR are included
- 12MP capture and a 121-degree viewing angle
- Human and vehicle detection with app alerts
- Two-way audio and color night vision
Cons:
- The listing conflicts on whether the included hard drive is 3TB or 4TB
- Adding cameras beyond the included eight requires a PoE switch, which is not included
- Wired PoE installation requires planning a cable connection for each camera
Best for: Owners of larger homes or properties who want eight fixed camera views and room to expand through a 16-channel recorder.
Not ideal for: Buyers who need wireless placement, camera auto-tracking, or clear confirmation of the included hard-drive capacity before purchase.
Bottom line: We’d choose Hiseeu when eight fixed views are the priority, after confirming the hard-drive capacity with the seller.
“We’d choose Hiseeu when eight fixed views are the priority, after confirming the hard-drive capacity with the seller.”
Blink Outdoor 4 Wireless Security Camera System, 5 Cameras with Sync Module Core
Blink is the clear choice when the main obstacle is getting cameras installed where we need them. Its five battery-powered cameras avoid the per-camera Ethernet runs required by Reolink and Hiseeu, so placement around a home is simpler. The cameras offer 1080p live view, infrared night vision, two-way audio, and enhanced motion detection. Batteries are rated for up to two years under default settings, which can reduce routine battery changes, though actual life depends on use and settings.That convenience comes with a different recording model. The included Sync Module Core does not support local storage, and cloud storage beyond the trial requires a subscription. Person detection also requires an optional subscription plan. Reolink and Hiseeu, by contrast, include recorder-based local storage and support continuous recording, making them stronger fits if we want footage retained without a cloud plan.Blink’s 143-degree diagonal field of view helps a camera see a broad scene, but 1080p provides less image detail than the 4K Reolink or stated 12MP Hiseeu systems. It makes the most sense for buyers who value simple, flexible placement and basic remote monitoring over high-resolution evidence and included local recording. Those who want to avoid subscriptions or need person detection without an optional plan should look to one of the wired systems instead.
Pros:
- Five cameras provide flexible coverage across several areas
- 1080p live view, infrared night vision, and two-way audio
- Enhanced motion detection and a 143-degree diagonal field of view
- Batteries are rated for up to two years under default settings
Cons:
- Included Sync Module Core does not support local storage
- Cloud storage beyond the trial requires a subscription
- Person detection requires an optional subscription plan
Best for: Renters and homeowners who want several easy-to-place cameras without running Ethernet to each location.
Not ideal for: Buyers who require included local storage, subscription-free cloud recording, or higher-resolution footage.
Bottom line: Blink is the simplest choice for cable-free placement, provided we are comfortable with its cloud-storage and subscription limits.
“Blink is the simplest choice for cable-free placement, provided we are comfortable with its cloud-storage and subscription limits.”
As an Amazon Associate we earn from qualifying purchases.
Before You Start
Plan camera views around entry doors, accessible ground-floor windows, garages, and paths leading to the home. Aim to record your property while limiting views into neighbors’ windows, shared hallways, or other private spaces. Check local privacy rules if a camera may record audio or areas used by other people. Do not place cameras where they can expose passwords, alarm keypads, or sensitive indoor activity. Keep cameras away from heat sources, strong glare, and locations where water can enter the power connection.
Use a stable ladder on level ground, and do not drill near outlets, wiring, or plumbing unless you know what is behind the surface. Switch off power at the breaker before working near household wiring. If the installation requires wiring you are not trained to handle, use a qualified installer.
Step-by-Step Instructions
Step 1: Choose camera locations
Walk around the property and mark the areas each camera should cover. Prioritize entrances and approach paths where a person would be visible before reaching a door or window. Check the manufacturer’s recommended mounting height and field of view. A camera mounted too high may capture the top of a person’s head; one mounted too low may be easy to block or damage. Stand at each proposed location and confirm that walls, plants, roof edges, or open doors will not hide the target area.
Tip:Use a phone or a temporary camera preview to check the view before drilling. Avoid aiming directly at bright lamps or the rising or setting sun, which can wash out footage.
Check: Each planned camera has a defined area to monitor, and the view avoids unnecessary coverage of private spaces.
Step 2: Check power and Wi-Fi
Confirm how each camera receives power: battery, indoor adapter, outdoor-rated adapter, or wired connection. Check that the cable can reach a protected outlet without crossing a walkway or being pinched by a door or window. Open the camera app or use your phone at the planned location to check Wi-Fi reception. If the signal is weak, try a location closer to the router or a compatible mesh access point before mounting.
Tip:Battery cameras need a reachable position for recharging. Wired cameras need a safe route for the cable and a connection rated for the location.
Check: The camera’s power plan is practical, and your phone receives a steady Wi-Fi signal at the planned position.
Step 3: Prepare the account and camera
Install the official app from your phone’s app store, create or sign in to your account, and follow the prompts to add the camera. Plug in the camera or charge its battery as directed. If the camera has a setup button or QR code, use the instructions supplied with that model. Connect it to the required Wi-Fi network and wait for the app to show that setup is complete. Give the camera a clear name, such as “Front Door” or “Garage,” so alerts are easy to identify.
Tip:Some cameras support only 2.4 GHz Wi-Fi. If setup fails on a combined network, check the manufacturer’s instructions for band selection or network compatibility.
Check: The app lists the camera by its chosen name and shows a live view or a connected status.
Step 4: Mount the camera
Hold the camera bracket at the selected position and mark its screw holes. Check that the bracket is level and that the lens will point toward the intended area. Drill pilot holes suited to the mounting surface, then secure the bracket with the supplied screws and anchors. Attach the camera and adjust its angle. For a battery or plug-in camera, secure cables along the route with suitable clips, leaving enough slack to remove the camera for service. Keep connectors sheltered and use only outdoor-rated parts outside.
Tip:Do not mount a camera where its cable can be pulled easily or where the camera blocks a door, window, or safety device.
Check: The bracket does not move when lightly touched, the camera points at the target area, and any cable is secured.
Step 5: Set recording and alert options
Open the camera’s settings and choose when it should record, such as continuously, during detected motion, or on a schedule. Select a storage option supported by the camera, such as a memory card, home hub, or cloud plan. Review motion sensitivity and detection zones, then draw zones around the areas you want monitored. Turn on notifications for the events you need to know about, and set quiet hours if appropriate. Review privacy controls, including audio recording, camera status lights, and any privacy shutter or mode.
Tip:Start with moderate motion sensitivity. High sensitivity can create frequent alerts from trees, traffic, or changing light; low sensitivity can miss activity.
Check: The camera has a recording method, a schedule or event rule, and notification settings that match how you intend to use it.
Step 6: Test the view, alerts, and recording
Use the live view while standing or walking through the monitored area. Check that faces and movement appear clearly in daylight and, if available, in night vision. Trigger a motion event and confirm that the phone receives the expected notification. Open the recording timeline or storage area and play the resulting clip. Adjust the camera angle, detection zone, or sensitivity if the clip misses the activity or records too much irrelevant movement.
Tip:Allow the camera to switch to night mode after dark, then check the view again. Reflections from nearby glass can obscure infrared night vision.
Check: You can view the monitored area, receive an alert for a test event, and play the resulting recording.
Step 7: Secure the account and document the setup
Use a unique password for the camera account and turn on two-step verification if the app offers it. Review which household members can access live view and recordings; remove access for anyone who no longer needs it. Check for camera or app updates in the manufacturer’s app, and apply them when convenient. Record the camera name, location, power type, and storage method in a safe place so you can maintain the system later.
Tip:Keep the account recovery method current. A lost account can prevent you from changing settings or removing a camera from the system.
Check: Only intended users have access, account protection is configured, and you know where each camera’s recordings are stored.
Common Mistakes to Avoid
- Forgetting that recordings need a configured storage method. — Select and check a supported storage option, then play a test clip before relying on the camera.
Troubleshooting
Problem: Night footage looks washed out or very dark.
Solution: Aim away from glass and reflective surfaces, check that the lens is clean, and remove objects close to the camera that may reflect infrared light. Review night vision settings and test the view after the camera has switched to night mode.
What Success Looks Like
The installation is complete when every camera stays connected at its mounted position, shows the intended area clearly, and records to the selected storage. A test walk should produce the expected notification and a playable clip. The camera view should avoid unnecessary private areas, cables and brackets should be secure, and only intended users should have account access.
Next Steps
Check camera status and recording storage weekly for the first month, then include them in a regular home security check. Clean lenses when dust or rain marks affect the image. Recharge batteries before they run low, inspect outdoor mounts and cables after severe weather, and review alerts after changing landscaping or lighting. Recheck account access when household members change. If a camera repeatedly disconnects or misses events after these adjustments, consult the model’s support documentation or a qualified installer.
Frequently Asked Questions
Where should I put a smart home security camera?
Start with entry doors, garage access, and paths approaching ground-floor windows. Choose a position that shows a person’s face and movement while limiting views into private areas. Check the camera’s field of view, lighting, and Wi-Fi before mounting.
Do smart cameras need Wi-Fi to record?
It depends on the model and storage method. Many cameras use Wi-Fi to send alerts and save clips to a cloud service, while some can record locally to a memory card or hub during an internet outage. Check the model’s specifications and test what continues to work when internet access is unavailable.
Can I install a camera outside?
Use a camera and power equipment rated for outdoor conditions. Follow the maker’s instructions for temperature, rain exposure, mounting, and cable connections. Protect plugs and connectors from water, and do not use an indoor adapter outdoors.
How can I reduce false motion alerts?
Set a detection zone around the areas that matter, aim away from busy roads and moving branches, and lower sensitivity in small steps. Test the result by walking through the area and check that a person still triggers an alert.
How do I know whether my camera is recording?
Trigger a test event, open the app’s timeline or storage section, and play the clip. Check that the timestamp and camera name are correct and that the clip includes the activity you performed.
Fall Picks
fall essentials
As an affiliate, we earn on qualifying purchases.